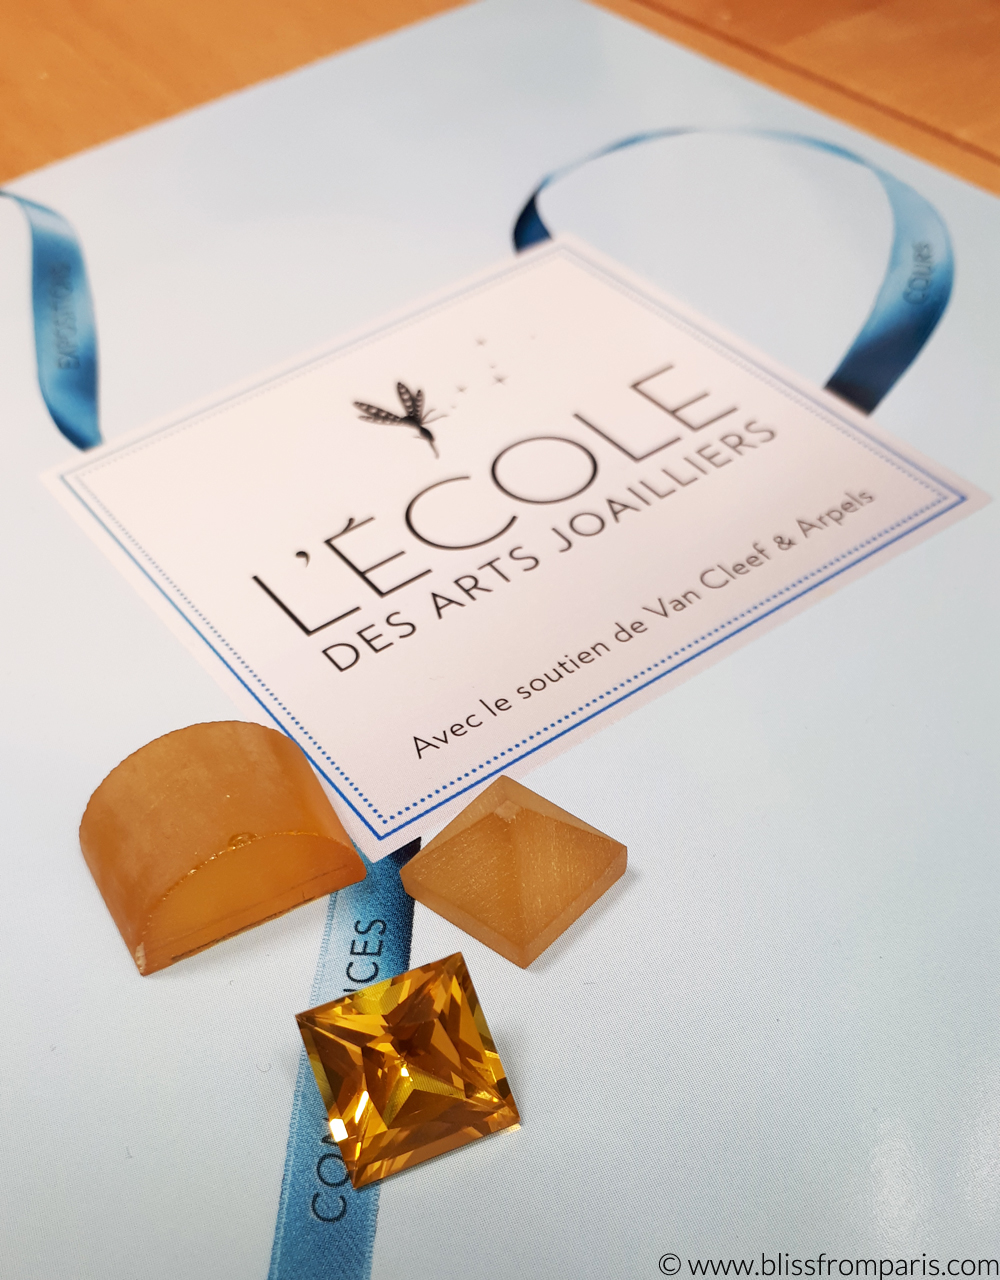
L’ÉCOLE, School of Jewelry Arts is enriching its offer with four new courses in 2020. Inaugurated in 2012 and supported by the Van Cleef maison, this school’s mission is to raise awareness of the secret and fascinating world of jewelry. I’ve followed the gemstones and email courses I’ve already talked about here:
The course “The univers of gemstones” at School of Jewelry Arts
The course “Jewelry and enamel large fires” at The Ecole des Arts Joailliers
This time I decided to take the courses on lapidary art. So here is the story of a future lapidary apprentice.

Since January the school has been offering new courses on lapidary art 1 – discovery: history and gestures and lapidary art 2- Initiation: cutting a colored stone. These courses are taught by a lapidary and a gemologist and available in French and English.
In the first course I learned the history of cutting: cabochon cutting by primitive faceting and finally elaborate faceting. In France the profession of lapidary appeared in the 11th century. The lapidaries were called crystallizers from the 13th century. They cut the precious stones and the rock crystal that the goldsmiths mounted in gold or silver. The elaborate faceting has been able to evolve thanks to the discovery of the laws of optics of Shell (1621) and Descartes (1637). The historic center for cutting precious and semi-precious stones in France was in the Jura, due to the proximity to the watch industry in Switzerland. Today there are several diamond cutting centers located in Tel Aviv, Antwerp, New York and Mumbai. In Europe Idar-Oberstein is the most important center for cutting of colored stones.
Before start cutting, it is necessary to observe the rough stone carefully to decide the best way to cut it, in order to get the most beautiful color while retaining the most important weight. To find your ideal size with optimal shine, you must avoid a size that is too thick or too flat. It is also useful to know the vocabulary and to know where the culet and the crown of the stone are.

The steps for cutting a stone proposed during the course are as follows: rought bruted stone , formed stone and facetted stone.
I started by abrading the rough stone table. Then I used the dop and the facet to cut it. At the end of this first course, I got the pre-formed or “bruted” stone.
Familiar with the lapidary’s cutting, I started the second course slightly more confident. This time I worked a stone on dop, that is to say a cementing on a metal stick. I used the index finger to rotate the stone and the degrees to change the angle of the cut.


The size I made is called “Marie cut”. It is a 17th century French cut, square with 4 triangles developed especially for the needs of the school. I used the steel and diamond wheel with a grain of 320 and 800. The size of a stone requires a certain delicacy and a confidence in the gesture. Each time you pass the facet cutter, it is necessary to check the accuracy of the action performed.

Once the faceting was finished, I went to the last step: polishing. I started use polishing machine on the outside and ended on the inside. I used a polish wheel which is made of tin and covered with a mixture of oil and powder.

I had a lot of fun during these two lessons. Proudly I made an almost perfect cut and it made me want to know better the craft of lapidary. If you also want to learn how to cut a stone, I highly recommend to book lessons at L’ÉCOLE, School of Jewelry Arts in Paris.